Admin Settings: Overview and Usage

Getting Started
The Admin Settings page lets you create and modify integrations between external platforms and your Measured account.
Be sure to make your customer success partner aware of any changes you make on this page.
The Integrations Tab
You can create integrations for the external platforms whose data you would like to see in Measured. These integrations fall into two categories: transaction data and marketing data.
- Transaction data is financial information on your sales and orders (i.e. Shopify).
- Marketing data is information related to your digital advertising (i.e. Google Ads).
Integrations
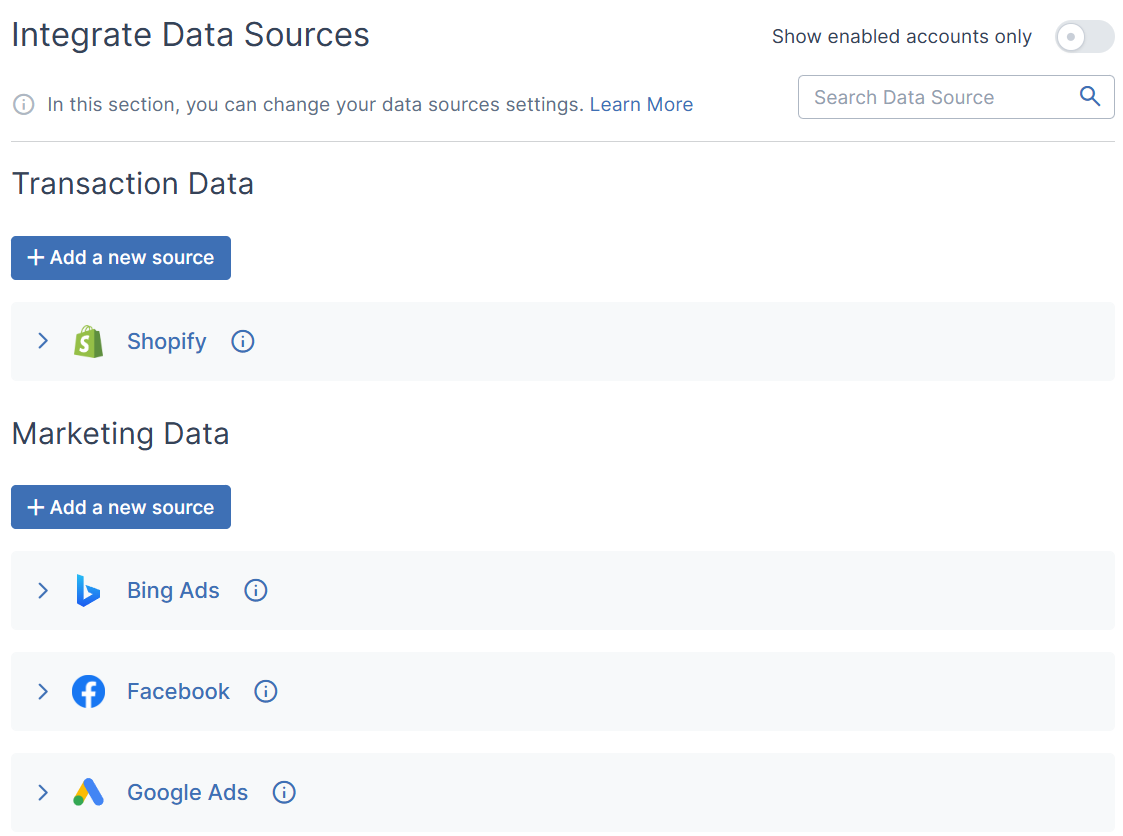
The first section you see when you go to the Integrations tab is where you can add new transaction or marketing data sources.
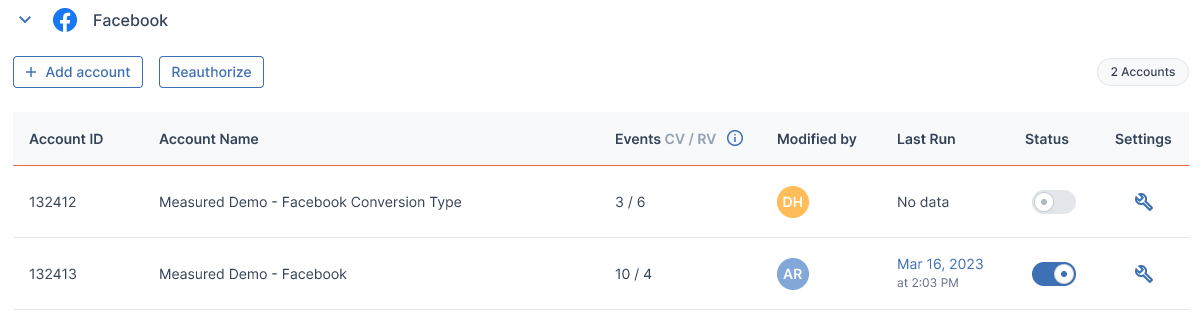
When a data source has been correctly added, you will see it under its appropriate category. Clicking its name will unfold a list of the accounts from that platform that are connected to Measured.
From this view, you can take actions such as enabling or disabling the integration and adjust its settings. You can also reauthorize the integration here if you receive an alert that that action is necessary.
Adding a Native Integration
If you are creating an integration for a platform that Measured allows self-service setup for, use the following steps:
- Click + Add a new source for the appropriate type of data source.
- Select a platform to integrate from the list of options.
- Follow the instructions for that platform that appear.
Adding a Non-Native Integration
You can integrate a new data source for your account, even if Measured does not natively support it.
- If you would like to integrate a marketing data source, contact your customer success partner.
- If you would like to integrate a transaction data source, follow these steps:
- Click + Add a new source for the appropriate type of data source.
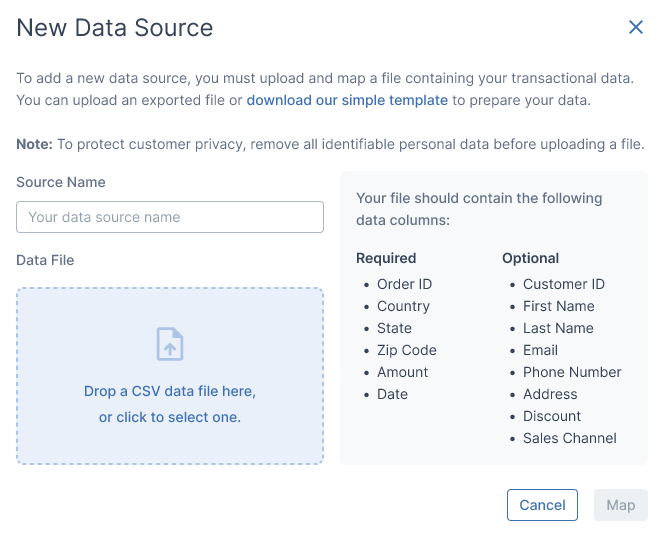
- Click New Data Source.
- Give your data source a name and upload a file of its data using the onscreen instructions. Your uploaded file must be in CSV format and have a single header row.
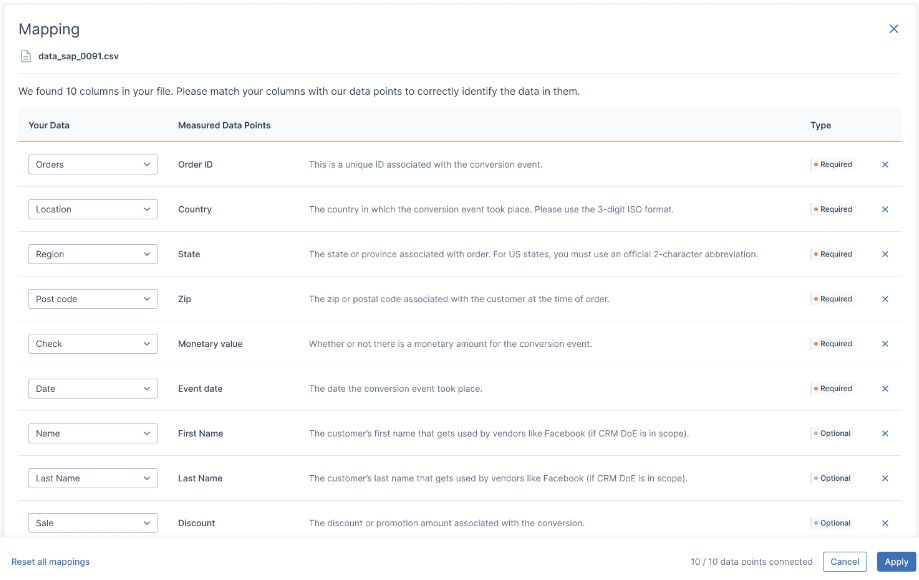
- You will be taken to the Mapping screen. Choose the columns from your CSV file that best match what is listed in the Measured Data Points column, then click Apply.
- Your data source will now be shown in the Transaction Data section of the Integrations page. It will be labeled as In Progress while it is processing, which should take roughly half an hour. You will be alerted if this process fails for any reason.
Uploading Data for Non-Native Integrations
Since data sources that you add do not have an API connection with Measured, you will need to regularly upload files to keep their data current. This can be done in one of two ways.
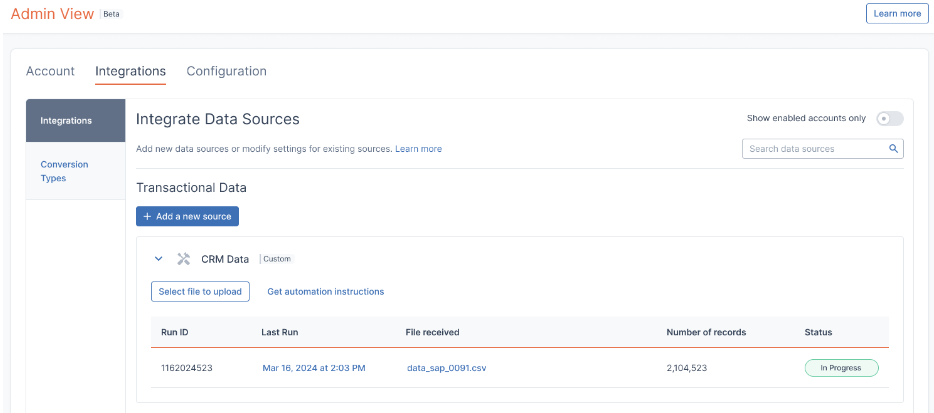
- Files can be uploaded manually by clicking Select file to upload under your chosen data source. On that screen that appears, drop a file containing updated data into it. You will be alerted when it is uploaded successfully.
- Alternatively, files can be set up to be automatically uploaded by clicking Get automation instructions. This will send you an email with details on accessing the Amazon S3 bucket folder. Then, your data engineering team can automate new data being uploaded at regular intervals.
Reauthorizing an Integration
If an error occurs with one of your integrations, you may need to reauthorize Measured’s connection with that platform. You will be alerted if this happens. Follow the steps below to fix this error.
Note: You will need admin-level permission in your integrated platform to complete reauthorization.
- On the Integrations tab of the Admin View page, click the name of the platform that needs reauthorization.
- After that section unfolds, click Reauthorize underneath the platform’s name.
- Follow the instructions that appear to login to the integrated platform.
- On the next screen, select the appropriate ad accounts and click Reauthorize.
You will receive a confirmation message if you reauthorization was successful. If you encounter errors during this process, contact our support team.
Data Source Validation
The Data Source Validation tab lets you verify the accuracy of your integrated data. When new data is uploaded into Measured from one of your transaction data sources (i.e. Shopify), it is important to make sure that information is correct.
The data from your integrations becomes the basis for what you see across Measured’s dashboards and recommendations. Errors in the source data may lead to incorrect assumptions, which lead to incorrect conclusions.
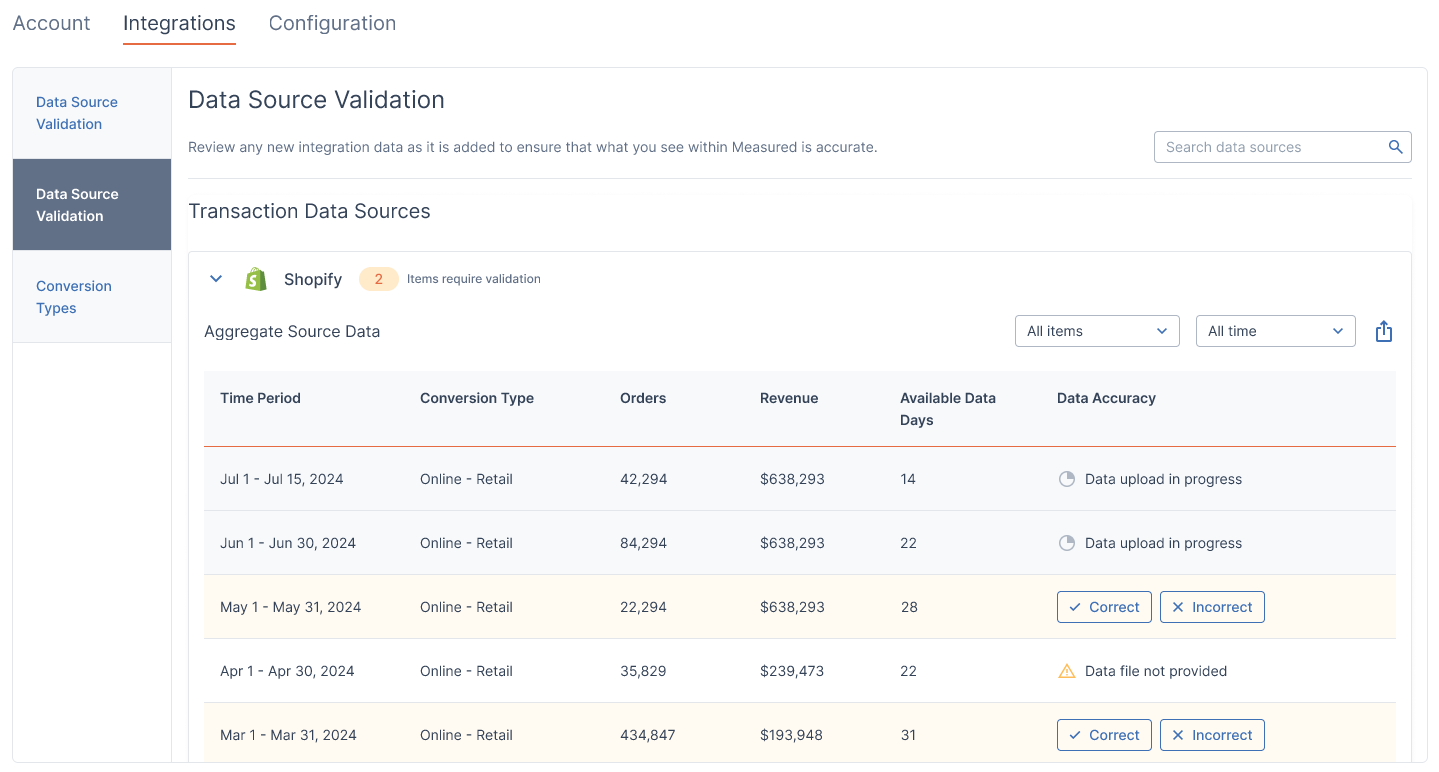
When you click on the Data Validation tab, you’ll see a list of all of your transaction data sources. If you click to unfold them, you will see a list of the timeframes of data for them within Measured, starting with the most recent.
Processing Adjustments
When cross-referencing data between Measured and the platform it stems from for accuracy, be aware that data may have been aggregated or filtered. This is done to translate it into dimensions used by Measured.
For instance, if you provide Measured with a broad set of global data, we will filter it to only address the countries within the scope of your account. Or, if your account only processes your web orders but that data comes with retail or app-based orders that are out of scope, we will narrow the initial down to what is usable.
This is important to remember in case you encounter data that appears to be incorrect or mislabeled. Contact our solutions team with any concerns.
Data Statuses
The Data Accuracy column will let you know the status of the listed timeframes of data that have either been automatically provided to Measured via API, or manually via a file upload. Data that has finished uploading will automatically be processed for use in Measured, and you can verify its accuracy with the two given options: Correct and Incorrect.
If you can confirm that the uploaded data aligns with what you see in the integrated platform, click Correct. This will signal to Measured and others on your team that there were no errors.
If you notice discrepancies, click Incorrect. This will launch a form where you can list the specific error(s) that you saw to send to our support team. They will then work on correcting it within Measured, and you will be alerted when this is completed.
The Configuration Tab
Within the Configuration tab, you can view the attribution settings for your connected data sources and the channels associated with them.
Note: This is read-only data, so it is strictly for reference purposes. If you feel that changes are needed, reach out to your customer success partner.
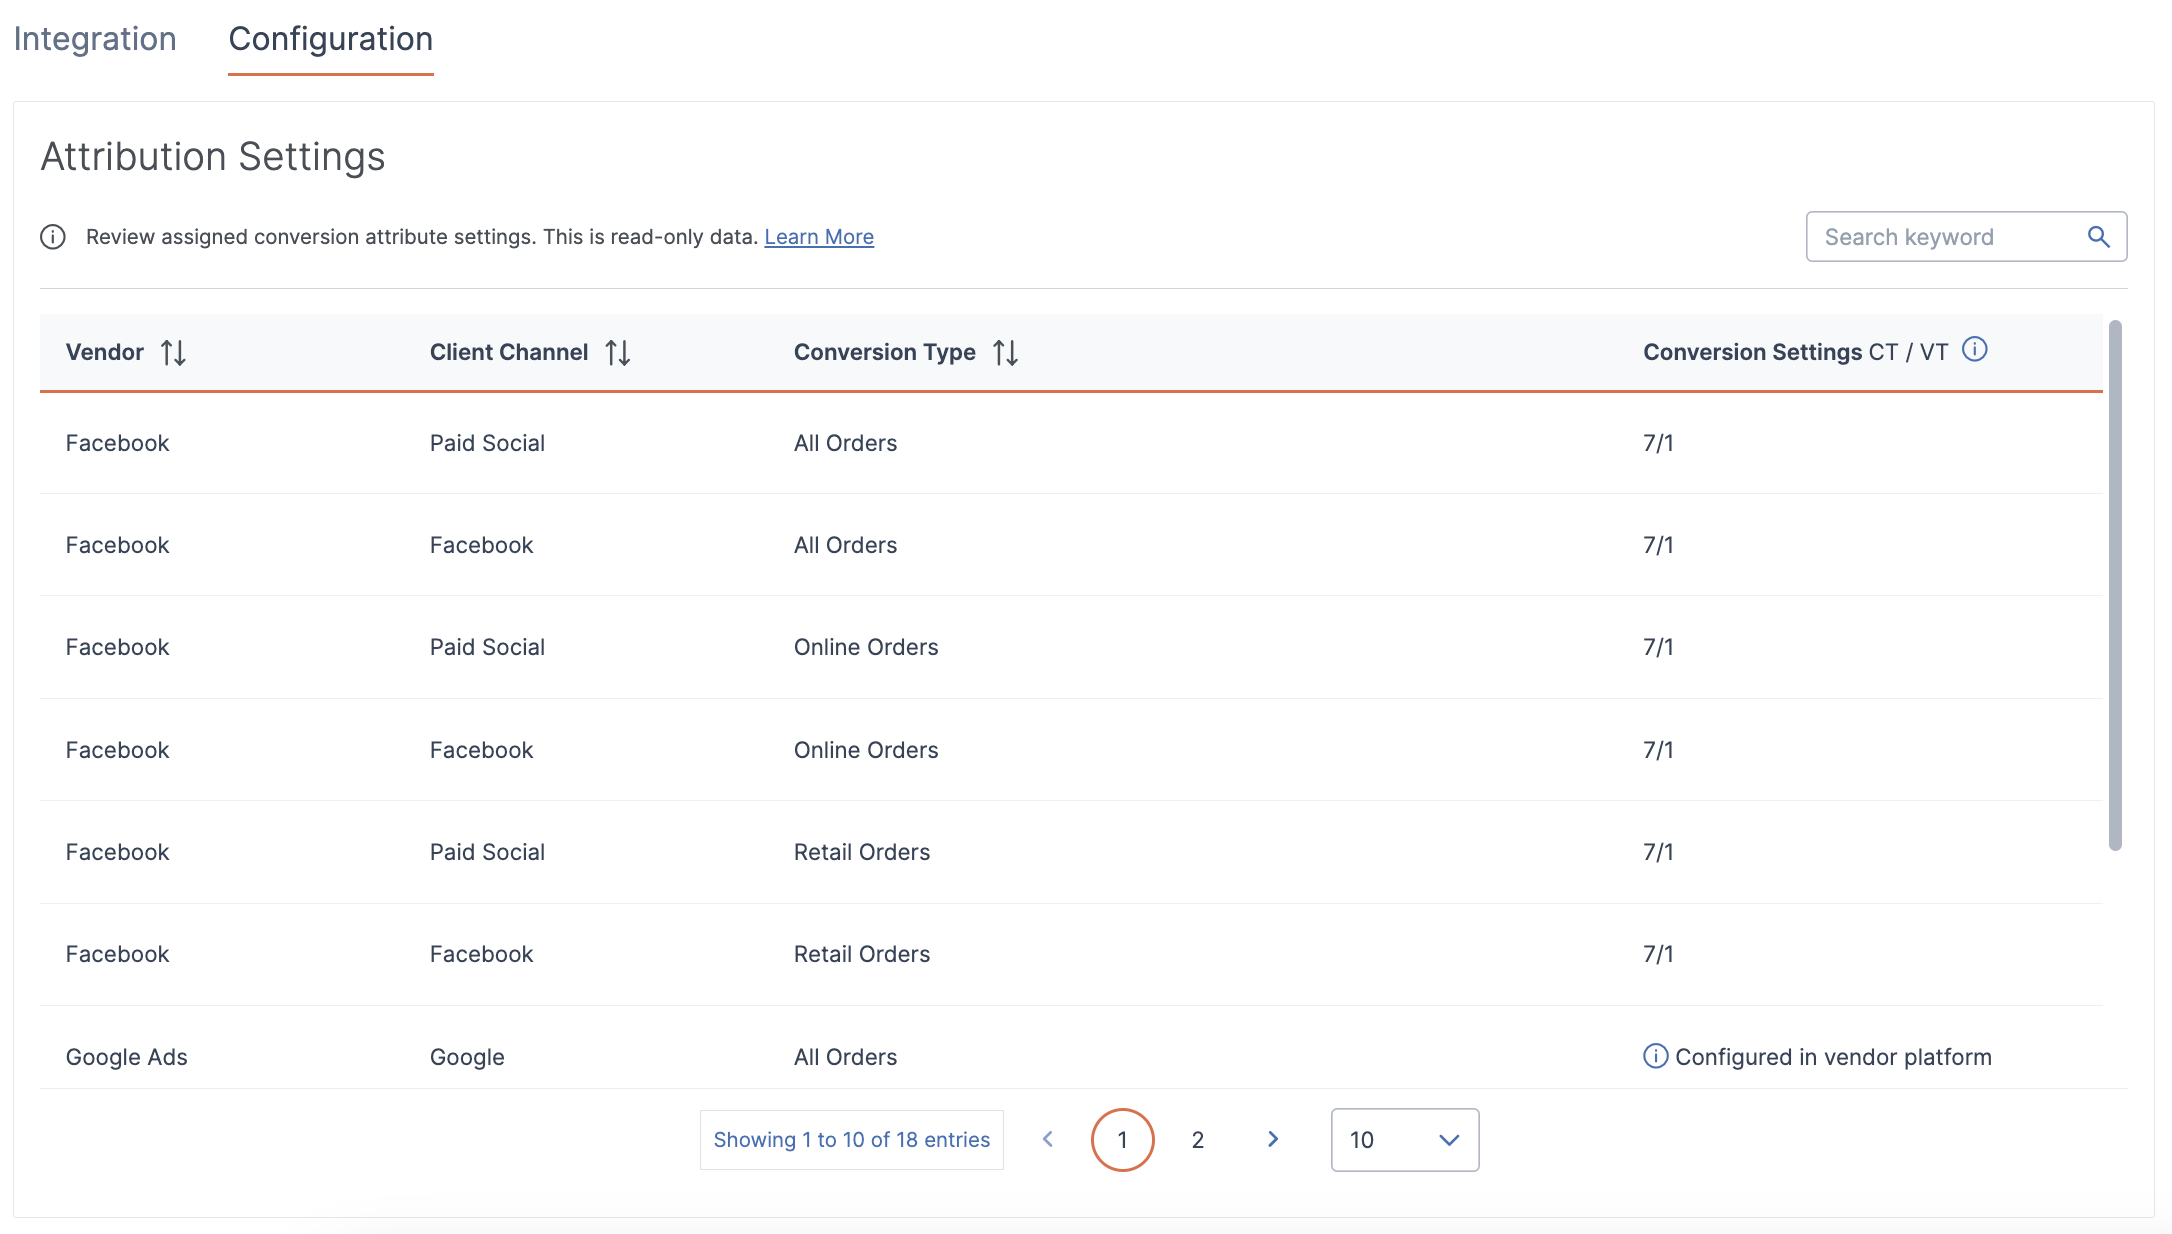
For each channel shown on this page, you will see its assigned conversion type. This affects how the channel factors into Measured dashboards and other features, where the option to view by specific conversion type may be listed alongside other broad controls, such as the date range for the displayed data.
In the far-right window, two types of conversion attribution windows are shown as numbers, when applicable: click-through and view-through. These types of attribution windows are widely used across ad platforms to gauge how conversions are assigned based on certain actions users take.
- Click-through conversions are attributed based on the last click associated with the customer ultimately converting
- View-through conversions are attributed based on the last impression event that can be assumed to have led to the user converting
As displayed in the Configuration tab, the CT/VT labeling lists the number of days for these windows. For example, in the image above, this is listed as “7/1,” meaning that the attribution windows are 7 days for click-through conversions and 1 day for view-through conversions.
If attribution windows are displayed in this CT/VT numerical format, that means that they have been configured within Measured to the specifications you have given us. Adjustments can be made by contacting your customer success partner. Currently, Facebook, Snapchat, and Pinterest can be configured in this way.
For all other cases, Measured uses the same attribution windows that already exist in those platforms, so adjustments need to be made manually outside of Measured.
Native Integrations By Platform
Below is a list of the platforms available as native integration with Measured. They are supported by API, so you can easily set them up yourself.
By clicking on the platform name, you will be taken to a separate article detailing integration setup. Remember to discuss any new integrations with your customer success partner.
If you would like to integrate a platform that is not shown here, note that Measured has over 300 possible connectors, and this list is only for self-service integrations. Contact your customer success partner for more details.
Microsoft Ads (Bing) Integration